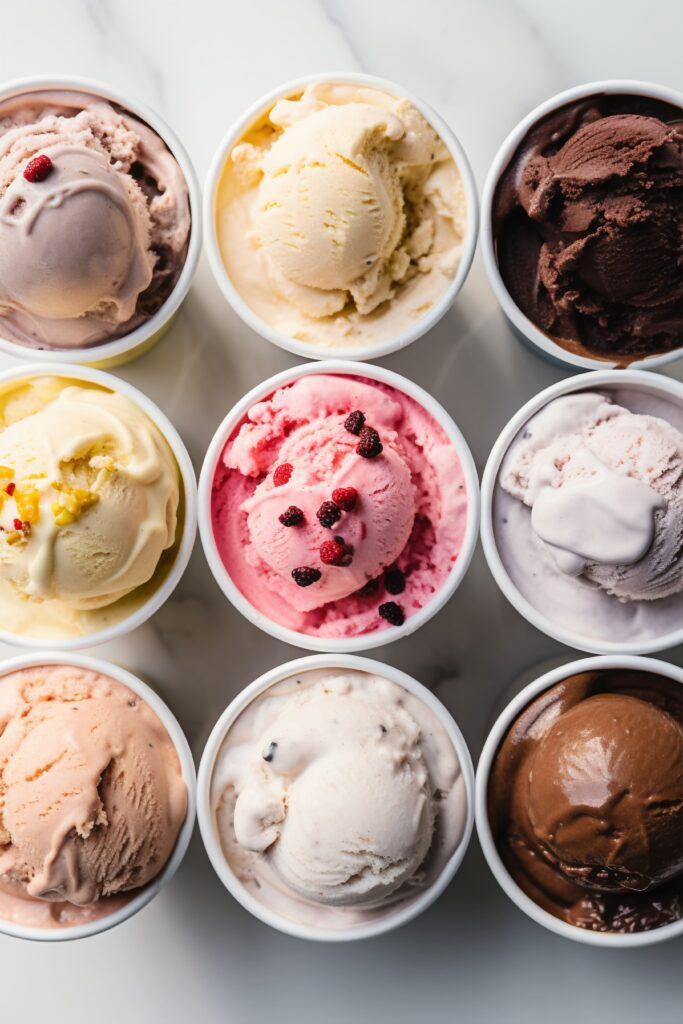
The Ninja Creami has become a favorite among dessert enthusiasts, thanks to its ability to create smooth, creamy frozen treats with ease. Whether you’re a seasoned dessert maker or a beginner looking for an easy way to make ice cream at home, this device has revolutionized the way we prepare frozen desserts. In this ultimate guide, we’ll dive deep into everything you need to know about Ninja Creami recipes, from essential ingredients to troubleshooting tips, plus creative flavor ideas to inspire your next batch.

Why Ninja Creami Recipes Are So Popular
Ninja Creami recipes are beloved for their versatility, quick prep times, and creamy results. This appliance allows you to experiment with endless possibilities, making everything from traditional ice cream to dairy-free sorbets. But why exactly has it gained so much traction in recent years? Let’s explore the reasons:
1. Customizable Flavors
One of the most attractive features of the Ninja Creami is the ability to create completely customizable flavors. Whether you’re a fan of classic vanilla, rich chocolate, or more adventurous combinations like salted caramel or raspberry cheesecake, the machine allows you to tailor every aspect of the recipe to your taste. If you like extra chocolate chunks, you can add them. Prefer a lighter, fruit-forward flavor? Go ahead and use more berries. You’re in control of the ingredients and their quantities.
2. Healthier Alternatives
For many, the Ninja Creami has become the go-to appliance for making healthier frozen treats. Instead of store-bought ice creams laden with sugar and artificial ingredients, you can make your own low-calorie, low-sugar, or even sugar-free ice cream using natural ingredients. You can also create dairy-free or vegan alternatives using coconut or almond milk, making it easier for those with dietary restrictions to enjoy their favorite frozen treats. Additionally, the ability to make protein ice cream with added protein powder is a huge bonus for fitness enthusiasts.
3. Quick and Easy
Unlike traditional ice cream-making methods that require churning or hours of preparation, the Ninja Creami simplifies the process. All you need to do is prepare the base, freeze it for 24 hours, and then let the machine do the work. The shaving and blending process takes just a few minutes, which makes the Ninja Creami perfect for last-minute dessert cravings.
If you’re looking for additional tools that can improve your cooking and dessert-making skills, take a look at this guide on how to make fried apple pies, which is a must-try for anyone interested in deep-frying!
4. User-Friendly
The design of the Ninja Creami is sleek and user-friendly. It’s easy to assemble, and with clear instructions, you don’t need to be an expert to make perfect frozen desserts. Plus, cleaning is a breeze—most parts are dishwasher safe, which means you can spend more time enjoying your creations than cleaning up afterward.
Key Ingredients for Ninja Creami Recipes
While the Ninja Creami machine does most of the work, selecting the right ingredients plays a significant role in ensuring your dessert turns out just as you imagined. Let’s take a deeper dive into the key ingredients that are essential for crafting amazing frozen treats.
1. Dairy vs. Non-Dairy
The choice between dairy and non-dairy ingredients can greatly impact the taste and texture of your frozen treats.
- Whole Milk: Full-fat milk is ideal for making creamy, smooth ice cream. It provides the right balance of fat and liquid that results in a rich, traditional texture.
- Heavy Cream: When combined with whole milk, heavy cream helps create a luxurious mouthfeel. You’ll often see heavy cream in recipes for rich, custard-style ice creams.
- Almond Milk: A popular non-dairy alternative, almond milk provides a lighter base that is still creamy, making it a great option for those following a vegan or dairy-free diet.
- Coconut Milk: Coconut milk is another dairy-free option that is thicker and richer than almond milk, making it ideal for creating rich, creamy desserts without the dairy.
If you’re looking for another delicious dessert to try alongside your Ninja Creami ice cream, consider checking out this Gluten-Free Apple Pie Recipe, which is perfect for those following a gluten-free diet.
2. Sweeteners
Choosing the right sweetener is critical to the flavor and texture of your Ninja Creami recipes. The Ninja Creami allows you to experiment with a variety of sweeteners based on your dietary preferences.
- Granulated Sugar: This is the most common sweetener used in traditional ice cream recipes. It dissolves well and provides the sweetness you’d expect from a store-bought dessert.
- Honey: Honey adds a natural sweetness and a slight floral flavor. It’s often used in more refined ice cream recipes.
- Stevia and Monk Fruit: For those on a low-carb or sugar-free diet, stevia and monk fruit are excellent alternatives. They are much sweeter than sugar, so you only need a small amount to achieve the desired level of sweetness.
3. Flavor Enhancers
This is where you can get creative! Whether you’re making classic vanilla or something more exotic, adding flavor enhancers is key to making your Ninja Creami recipe stand out. Some common flavor enhancers include:
- Vanilla Extract: A small amount of vanilla extract adds depth and warmth to almost any ice cream base.
- Cocoa Powder: Perfect for chocolate ice cream, cocoa powder adds a rich, slightly bitter flavor that balances out the sweetness.
- Fruit Purees: Fresh or frozen fruit purees can add a burst of flavor and vibrant color to your frozen desserts.
- Spices: Nutmeg, cinnamon, or even a pinch of sea salt can elevate a dessert and create complex flavors.
How the Ninja Creami Works
The Ninja Creami operates by freezing and then shaving your base mixture into a creamy consistency. Here’s a detailed breakdown of how the process works:
1. Prepare the Mixture
Start by blending your ingredients in a bowl. Once the ingredients are well combined, pour them into the Ninja Creami bowl. If you’re making an ice cream, the mixture should be creamy and smooth. For sorbets, the mixture can be a bit more liquid, depending on the fruits you’re using.
2. Freeze the Mixture
After pouring the mixture into the bowl, it needs to freeze for at least 24 hours. This is one of the key steps in getting that perfect texture. Make sure the bowl is placed in a flat position in the freezer to ensure even freezing.
3. Process the Mixture
Once the mixture is fully frozen, place it into the Ninja Creami machine. The machine works by shaving the frozen mixture, turning it into a smooth, creamy texture. Depending on your recipe, you may need to use the “re-spin” function to achieve the desired consistency.
For more kitchen tips and tricks, you can explore our Chicken Parmesan Sandwich Recipe, which pairs wonderfully with any of your homemade Ninja Creami desserts.
Classic Ninja Creami Vanilla Ice Cream Recipe
One of the most popular recipes for the Ninja Creami is the classic vanilla ice cream. This is a fantastic base recipe that you can modify by adding your favorite mix-ins like chocolate chips, caramel, or fruit. Here’s how you can make it:
Ingredients:
- 2 cups heavy cream
- 1 cup whole milk
- ¾ cup granulated sugar
- 1 tbsp vanilla extract
Instructions:
- In a large mixing bowl, combine the heavy cream, whole milk, sugar, and vanilla extract. Stir until the sugar is completely dissolved.
- Pour the mixture into the Ninja Creami bowl and freeze for 24 hours.
- Once the mixture is fully frozen, place the bowl into the Ninja Creami and process until smooth.
- Enjoy your homemade vanilla ice cream!
For a savory dish to go with your sweet treat, try the Mississippi Pot Roast Recipe.
Healthy Ninja Creami Ice Cream Recipes
For those looking to indulge without the guilt, the Ninja Creami can help you create healthy ice cream alternatives. You can make ice cream with less sugar, fewer calories, or even add protein to boost your post-workout recovery. Below are some of the best healthy recipes:
1. Keto Vanilla Ice Cream
To make keto-friendly ice cream, swap out regular sugar for a sugar substitute like erythritol and use almond milk instead of regular milk.
- Ingredients:
- 2 cups almond milk (unsweetened)
- ½ cup heavy cream
- ¼ cup erythritol
- 1 tsp vanilla extract
2. Protein-Packed Ice Cream
Add protein powder to your base for a delicious and nutritious treat. Vanilla whey protein works wonderfully, but feel free to use your preferred flavor.
- Ingredients:
- 2 cups unsweetened almond milk
- 1 scoop vanilla protein powder
- ½ cup Greek yogurt
- Sweetener of your choice (stevia or monk fruit)
Troubleshooting Common Ninja Creami Problems
While the Ninja Creami is an amazing appliance, there are a few common issues you might encounter. Let’s go over how to troubleshoot them:
1. Ice Cream Too Hard or Too Soft
If your ice cream turns out too hard or too soft, it could be due to the freezing time or the composition of the base. Always make sure to freeze the mixture for 24 hours. If it’s too soft, you can re-spin it in the Ninja Creami, or if it’s too hard, let it sit for a few minutes before processing.
2. Mixture Doesn’t Blend Smoothly
If the mixture isn’t blending properly, ensure that your ingredients are well-mixed and that you’re not overloading the Ninja Creami. Sometimes, adjusting the consistency of the mixture with a bit of milk can help.
FAQs About Ninja Creami recipes
How long does it take to make ice cream in the Ninja Creami?
- Typically, it takes 5-10 minutes to process the ingredients once they’re frozen for 24 hours.
Can I make multiple batches of frozen desserts back-to-back?
- Yes, the Ninja Creami is designed for continuous use, so you can make as many batches as you like.
How do I prevent ice crystals in my Ninja Creami ice cream?
- Ensure the mixture is well-chilled before freezing, and use stabilizers like guar gum if necessary.
How should I clean the Ninja Creami?
- The bowl, lid, and mixing paddle are dishwasher-safe. Clean immediately after use for the best results.

